[Android] 안드로이드 WebView App 제작 방법
안드로이드 WebView App 제작 방법
Android WebView App
Android 9.0(pie) 기준으로 작성되었습니다.
개발
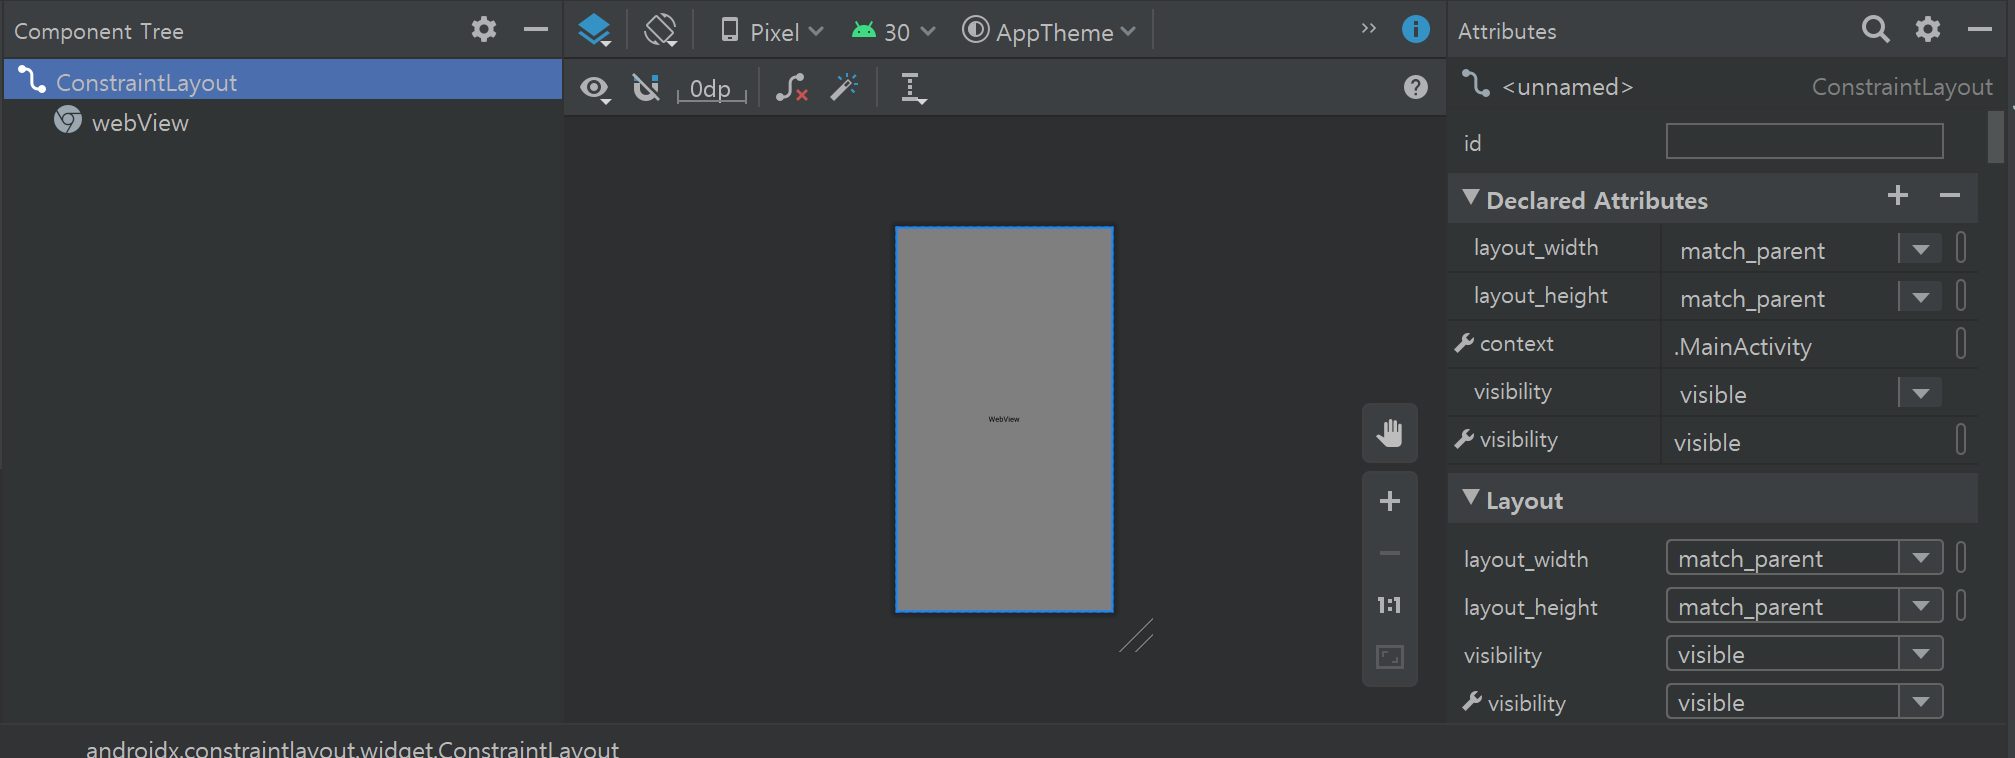
화면 설정
- activity_main.xml
<?xml version="1.0" encoding="utf-8"?>
<androidx.constraintlayout.widget.ConstraintLayout xmlns:android="http://schemas.android.com/apk/res/android"
    xmlns:app="http://schemas.android.com/apk/res-auto"
    xmlns:tools="http://schemas.android.com/tools"
    android:layout_width="match_parent"
    android:layout_height="match_parent"
    android:visibility="visible"
    tools:context=".MainActivity"
    tools:visibility="visible">

    <WebView
        android:id="@+id/webView"
        android:layout_width="0dp"
        android:layout_height="0dp"
        android:visibility="visible"
        app:layout_constraintBottom_toBottomOf="parent"
        app:layout_constraintEnd_toEndOf="parent"
        app:layout_constraintStart_toStartOf="parent"
        app:layout_constraintTop_toTopOf="parent"
        tools:visibility="visible" />

</androidx.constraintlayout.widget.ConstraintLayout>
설정
AndroidManifest.xml
<?xml version="1.0" encoding="utf-8"?>
<manifest xmlns:android="http://schemas.android.com/apk/res/android"
    package="com.a106.course2go">

    <!-- 인터넷 사용 -->
    <uses-permission android:name="android.permission.INTERNET" />
    <uses-permission android:name="android.permission.ACCESS_NETWORK_STATE" />
	<!-- 카메라 하드웨어 사용 -->
    <uses-feature android:name="android.hardware.camera"
        android:required="false"/>
    <!-- 5.0(Lollipop) 버전 파일업로드 퍼미션 -->
    <uses-permission android:name="android.permission.READ_EXTERNAL_STORAGE" android:maxSdkVersion="18"/>
    <!-- 외부 저장소 사용 -->
    <uses-permission android:name="android.permission.WRITE_EXTERNAL_STORAGE" />

    <application
        android:allowBackup="true"
        android:icon="@mipmap/ic_launcher_foreground"
        android:label="@string/app_name"
        android:roundIcon="@mipmap/ic_launcher_round"
        android:supportsRtl="true"
        android:theme="@style/AppTheme"
        android:networkSecurityConfig="@xml/network_security_config"
        android:usesCleartextTraffic="true">
        <provider
            android:name="androidx.core.content.FileProvider"
            android:authorities="${applicationId}.fileprovider"
            android:exported="false"
            android:grantUriPermissions="true">
        <meta-data
            android:name="android.support.FILE_PROVIDER_PATHS"
            android:resource="@xml/file_paths" />
        </provider>
        <activity android:name="com.a106.course2go.MainActivity">
            <intent-filter>
                <action android:name="android.intent.action.MAIN" />

                <category android:name="android.intent.category.LAUNCHER" />
            </intent-filter>
        </activity>
    </application>

</manifest>
참고사항
<uses-permission android:name="android.permission.CAMERA" />- 이 부분을 넣는 경우에는 카메라가 정상적으로 작동되지 않음
<manifest xmlns:android="http://schemas.android.com/apk/res/android" package="com.a106.course2go">- PlayStore 출시를 위해서는
com.example.course2go에서com.*.course2go로 변경해야 함
- PlayStore 출시를 위해서는
Project Icon 변경
res에서우클릭후New -> Image Asset클릭
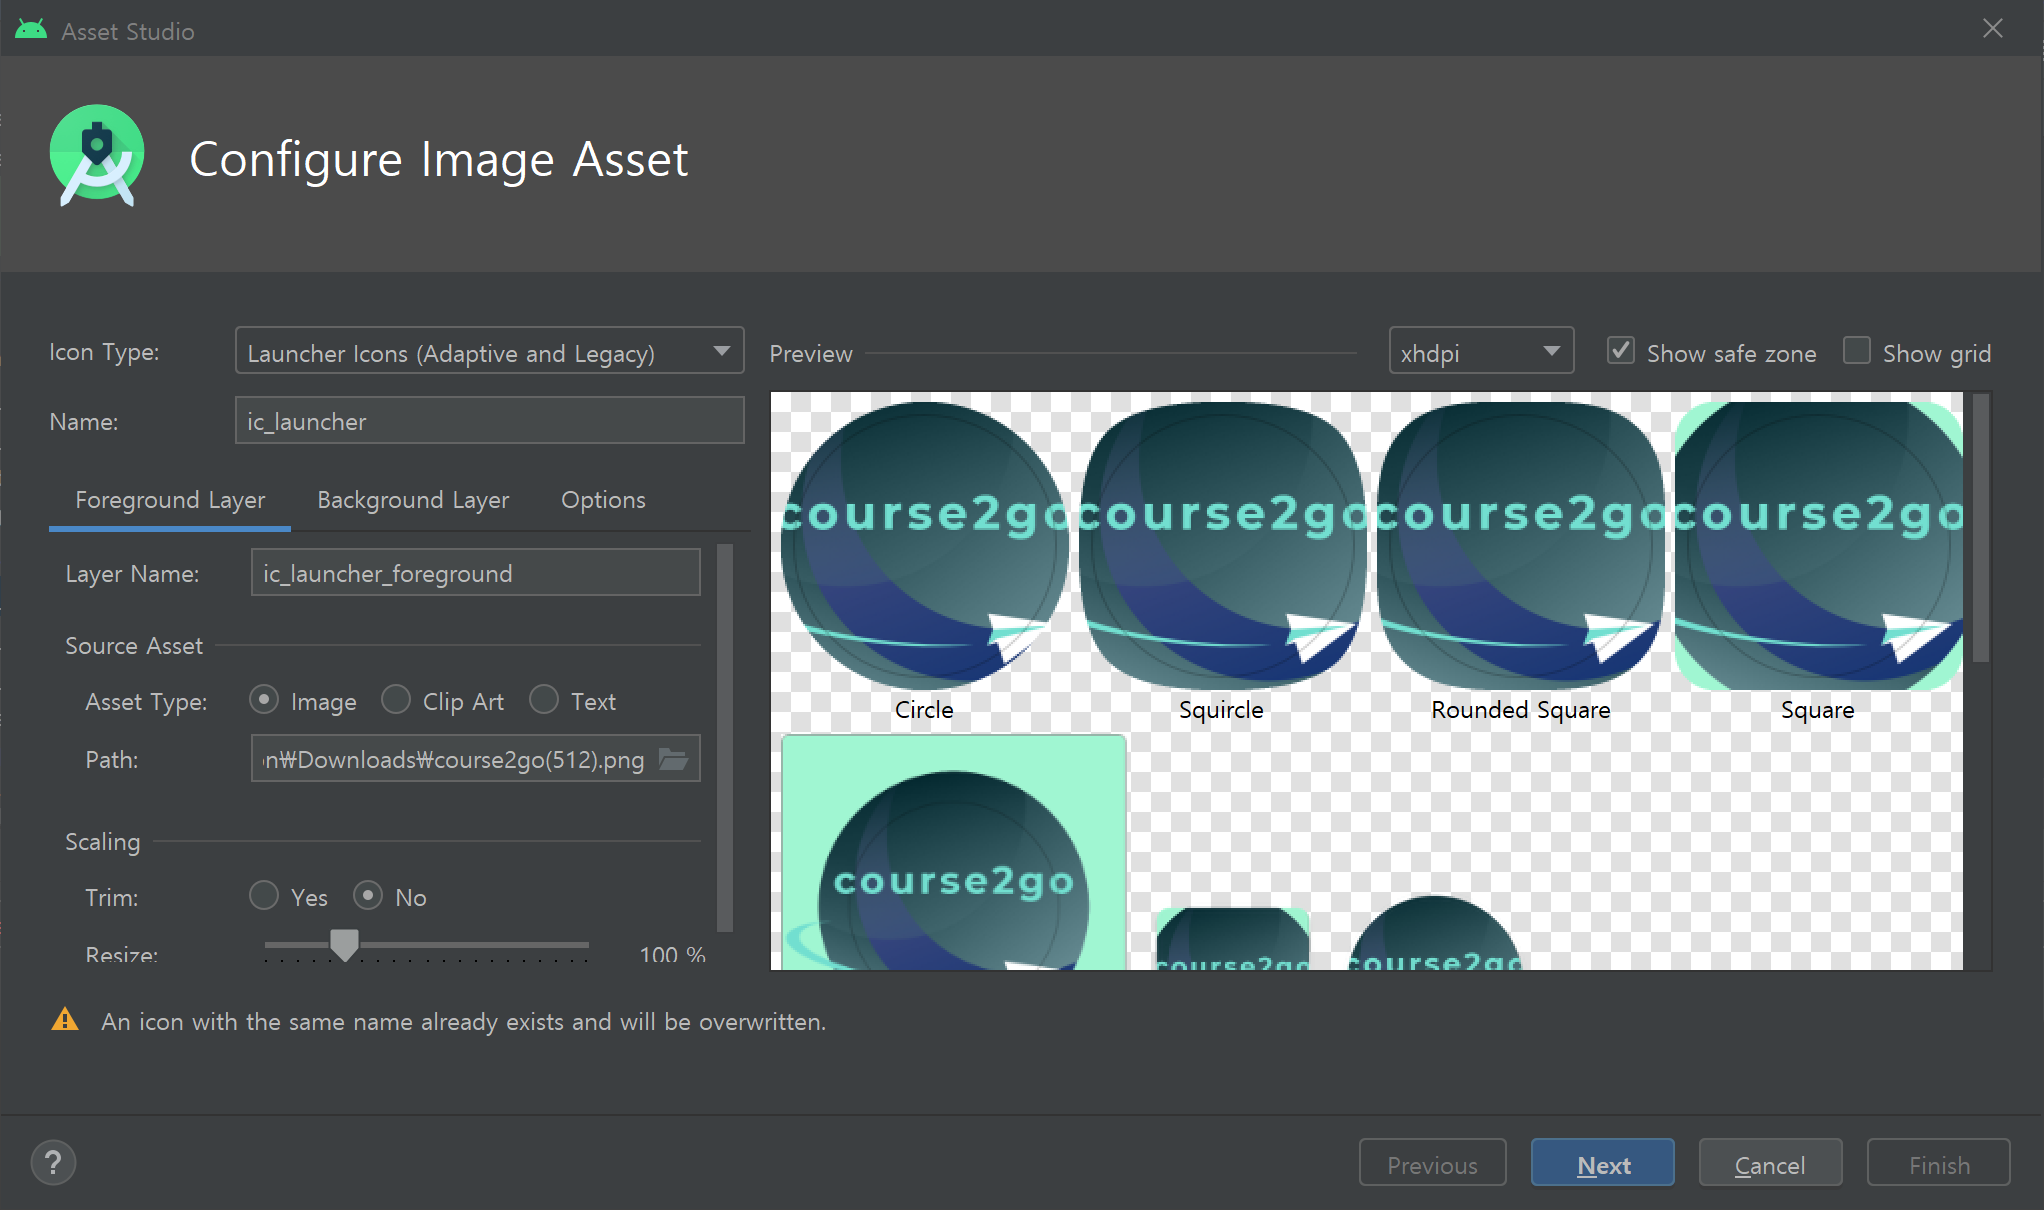
Source Asset -> Path에서 이미지 선택
- Size (dp)는 512x512 추천
- 확인 후
Finish클릭 !res -> mipmap에 있는 이미지들이 잘 변경되었나 확인
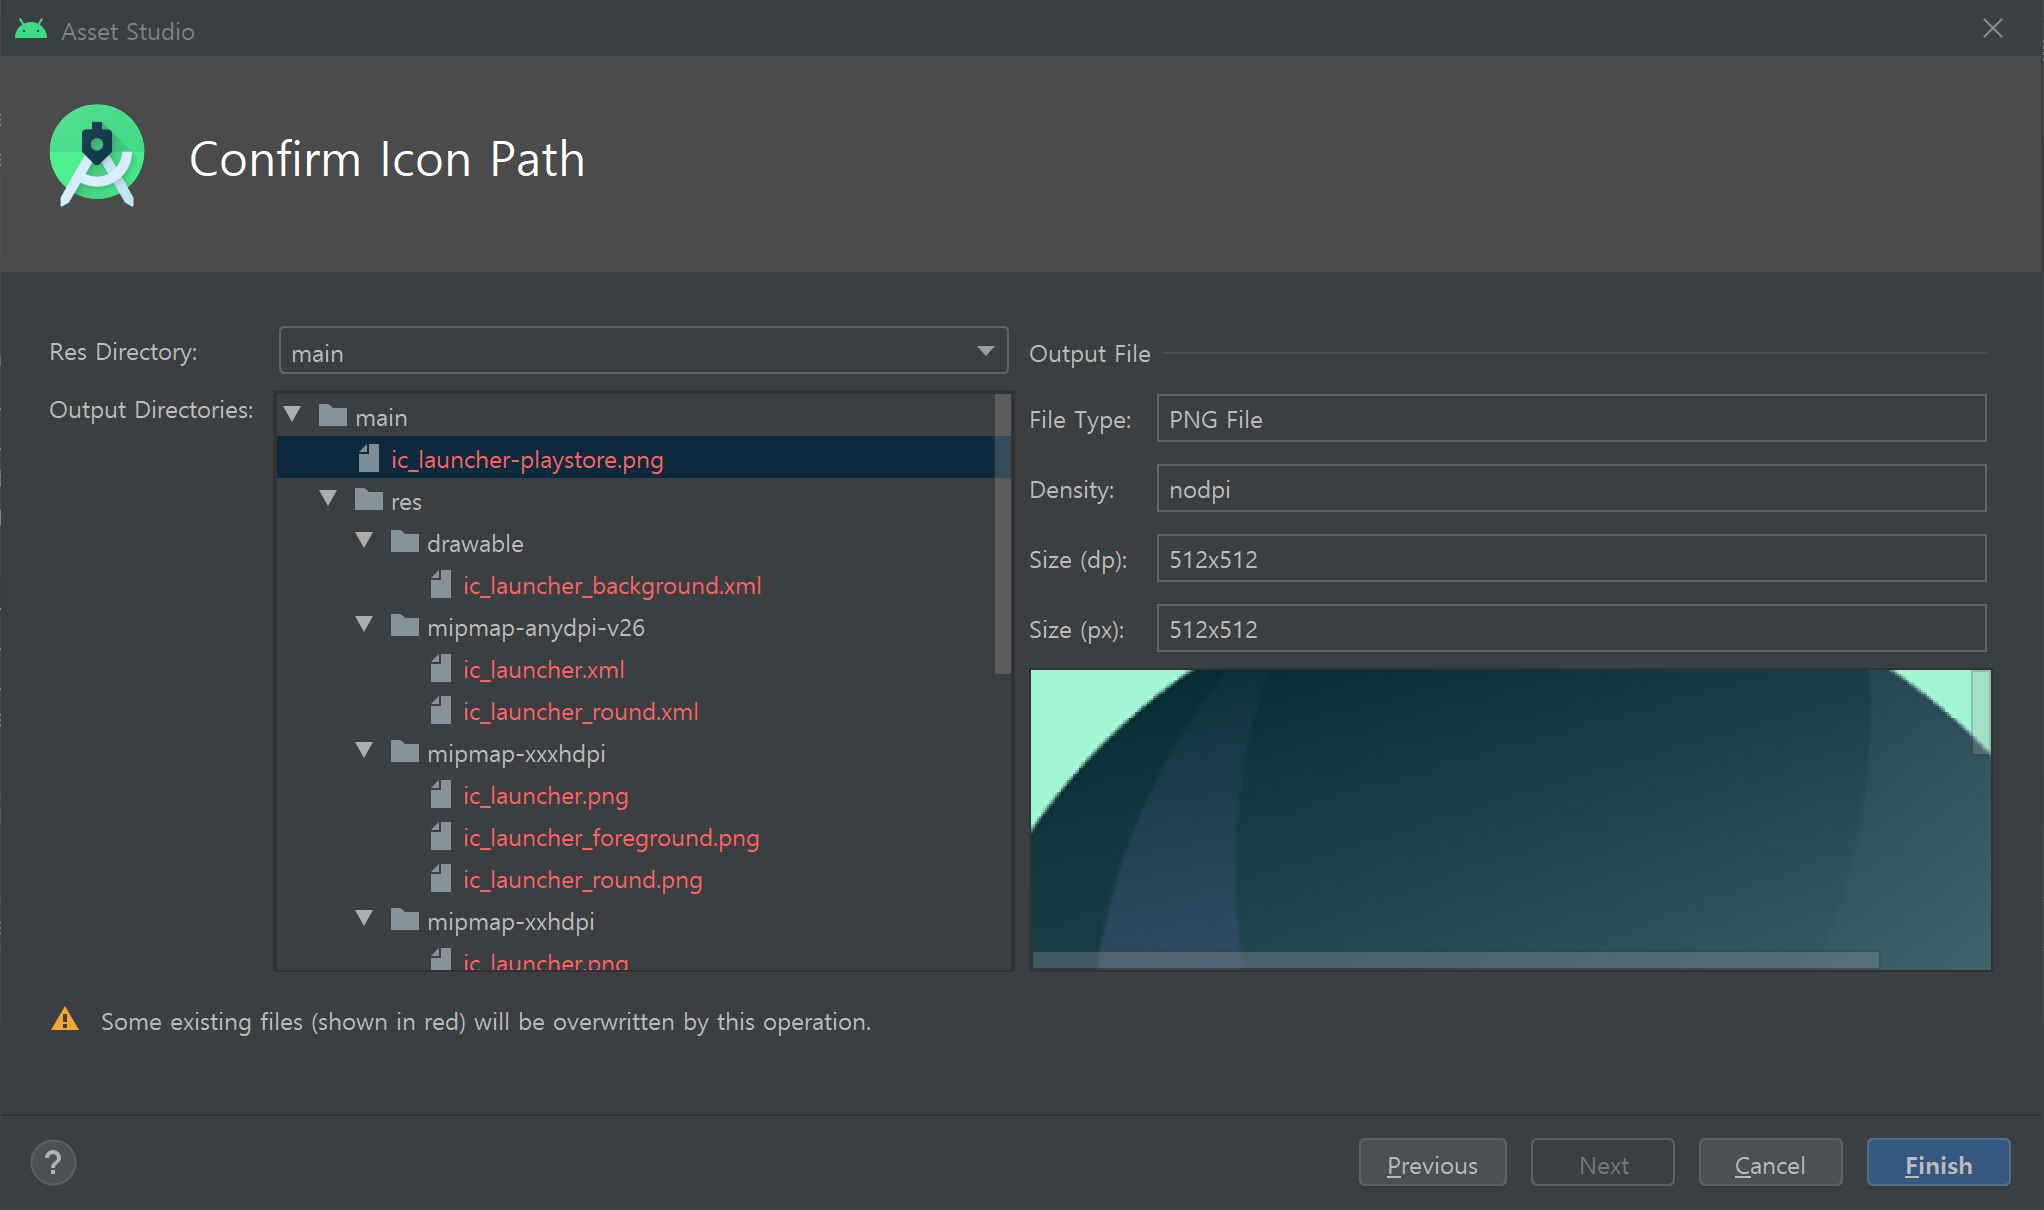
- 변경한 사진 적용
android:icon="@mipmap/ic_launcher_foreground"
android:roundIcon="@mipmap/ic_launcher_round"
폴더 이름으로 설정(폴더 더블 클릭하면 이미지 나옴) 사진 이름이 변경되었다면 코드도 변경하자
build.gradle (:app)
apply plugin: 'com.android.application'

android {
    compileSdkVersion 30
    buildToolsVersion "30.0.2"

    defaultConfig {
        applicationId "com.a106.course2go"
        minSdkVersion 25
        targetSdkVersion 30
        versionCode 1
        versionName "1.0"

        testInstrumentationRunner "androidx.test.runner.AndroidJUnitRunner"
    }

    buildTypes {
        release {
            minifyEnabled false
            proguardFiles getDefaultProguardFile('proguard-android-optimize.txt'), 'proguard-rules.pro'
        }
    }
}

dependencies {
    implementation fileTree(dir: "libs", include: ["*.jar"])
    implementation 'androidx.appcompat:appcompat:1.2.0'
    implementation 'androidx.constraintlayout:constraintlayout:2.0.4'
    testImplementation 'junit:junit:4.12'
    androidTestImplementation 'androidx.test.ext:junit:1.1.2'
    androidTestImplementation 'androidx.test.espresso:espresso-core:3.3.0'
}
주의사항
코드 수정 후 플레이스토어에 새로운 버전으로 업데이트하는 경우 버전을 이전보다 하나씩 올려야 한다.
versionCode 1
versionName "1.0"
프로젝트 패키지명 변경 후에는
defaultConfig > applicationId확인
res/xml
res 밑에 xml 폴더를 만들어
file_paths.xml과network_security_config.xml파일 생성 후 아래 코드 추가
- file_paths.xml
<?xml version="1.0" encoding="utf-8"?>
<paths xmlns:android="http://schemas.android.com/apk/res/android">
    <files-path name="files" path="/" />
</paths>
- network_security_config.xml
<?xml version="1.0" encoding="utf-8"?>
<network-security-config>
    <base-config cleartextTrafficPermitted="true"/>
</network-security-config>
res/values/styles.xml
상단 title bar를 삭제하기 위해 아래 두 줄 추가
AndroidManifest.xml에서도 작업을 수행할 수 있지만 특정 상황에서 생길 수 있는 오류를 방지하기 위해styles.xml에 작업
<resources>
    <!-- Base application theme. -->
    <style name="AppTheme" parent="Theme.AppCompat.Light.DarkActionBar">
        <!-- Customize your theme here. -->
        <item name="colorPrimary">@color/colorPrimary</item>
        <item name="colorPrimaryDark">@color/colorPrimaryDark</item>
        <item name="colorAccent">@color/colorAccent</item>
        <!-- 상단 title bar -->
        <item name="windowActionBar">false</item>
        <item name="windowNoTitle">true</item>
    </style>
</resources>
MainActivity
package com.a106.course2go;

import androidx.annotation.NonNull;
import androidx.annotation.RequiresApi;
import androidx.appcompat.app.AlertDialog;
import androidx.appcompat.app.AppCompatActivity;
import androidx.core.content.FileProvider;

import android.Manifest;
import android.annotation.TargetApi;
import android.content.DialogInterface;
import android.content.Intent;
import android.content.pm.PackageManager;
import android.net.Uri;
import android.os.Build;
import android.os.Bundle;
import android.os.Parcelable;
import android.provider.MediaStore;
import android.provider.Settings;
import android.util.Log;
import android.webkit.JsResult;
import android.webkit.ValueCallback;
import android.webkit.WebChromeClient;
import android.webkit.WebSettings;
import android.webkit.WebView;
import android.webkit.WebViewClient;
import android.widget.Toast;

import java.io.File;

public class MainActivity extends AppCompatActivity {
    private WebView webView;
    private long pressedTime;

    public ValueCallback<Uri> filePathCallbackNormal;
    public ValueCallback<Uri[]> filePathCallbackLollipop;
    public final static int FILECHOOSER_NORMAL_REQ_CODE = 2001;
    public final static int FILECHOOSER_LOLLIPOP_REQ_CODE = 2002;
    private Uri cameraImageUri = null;

    @Override
    protected void onCreate(Bundle savedInstanceState) {
        super.onCreate(savedInstanceState);
        setContentView(R.layout.activity_main);

        webView = findViewById(R.id.webView);

        WebSettings webSettings = webView.getSettings();
        // JavaScript
        webSettings.setJavaScriptEnabled(true);
        // LocalStorage
        webSettings.setDomStorageEnabled(true);
        webSettings.setJavaScriptCanOpenWindowsAutomatically(true);

        checkVerify();

        webView.setWebViewClient(new WebViewClient());

        webView.setWebChromeClient(new WebChromeClient() {
            //
            //웹뷰에 alert창에 url을 제거한다.
            //
            public boolean onJsAlert(WebView view, String url, String message,
                                     final android.webkit.JsResult result) {
                new AlertDialog.Builder(MainActivity.this)
                        .setTitle("")
                        .setMessage(message)
                        .setPositiveButton(android.R.string.ok,
                                new AlertDialog.OnClickListener() {
                                    public void onClick(DialogInterface dialog, int which) {
                                        result.confirm();
                                    }
                                })
                        .setCancelable(false)
                        .create()
                        .show();
                return true;
            }

			//
            //웹뷰에 Confirm창에 url을 제거한다.
            //
            @Override
            public boolean onJsConfirm(WebView view, String url,
                                       String message, final JsResult result) {

                new AlertDialog.Builder(MainActivity.this)
                        .setTitle("")
                        .setMessage(message)
                        .setPositiveButton(android.R.string.ok,
                                new DialogInterface.OnClickListener() {

                                    public void onClick(DialogInterface dialog, int which) {
                                        result.confirm();
                                    }
                                })
                        .setNegativeButton(android.R.string.cancel,
                                new DialogInterface.OnClickListener() {

                                    @Override
                                    public void onClick(DialogInterface dialog, int which) {
                                        result.cancel();
                                    }
                                })
                        .setCancelable(false)
                        .create()
                        .show();
                return true;
            }

			//
            // For Android 5.0+ 카메라 - input type="file" 태그를 선택했을 때 반응
            //
            @RequiresApi(api = Build.VERSION_CODES.LOLLIPOP)
            public boolean onShowFileChooser(
                    WebView webView, ValueCallback<Uri[]> filePathCallback,
                    FileChooserParams fileChooserParams) {
                Log.d("MainActivity", "5.0+");

                // Callback 초기화 (중요!)
                if (filePathCallbackLollipop != null) {
                    filePathCallbackLollipop.onReceiveValue(null);
                    filePathCallbackLollipop = null;
                }
                filePathCallbackLollipop = filePathCallback;

                boolean isCapture = fileChooserParams.isCaptureEnabled();
                runCamera(isCapture);
                return true;
            }

        });

        webView.loadUrl("http://192.168.25.62:3000/");
    }

	//
    // 닫기 전 물어보기
    // 일단 뉴스피드에서는 무조건 가능하게 해놨음. 다른 프로젝트에 사용 시 이 부분 수정 필요
   	//
    @Override
    public void onBackPressed() {
        if (webView.getUrl().equalsIgnoreCase("https://i5a106.p.ssafy.io/newsfeed") ||
                webView.getUrl().equalsIgnoreCase("https://i5a106.p.ssafy.io/")) {
            if (pressedTime == 0) {
                Toast.makeText(MainActivity.this, "한번 더 누르시면 종료됩니다.", Toast.LENGTH_SHORT).show();
                pressedTime = System.currentTimeMillis();
            } else {
                int seconds = (int) (System.currentTimeMillis() - pressedTime);

                if (seconds > 2000) {
                    pressedTime = 0;
                } else {
                    finish();
                }
            }
        } else if (webView.canGoBack()) {
            webView.goBack();
        }
    }

	//
    //권한 획득 여부 확인
    //
    @TargetApi(Build.VERSION_CODES.M)
    public void checkVerify() {

        if (checkSelfPermission(Manifest.permission.INTERNET) != PackageManager.PERMISSION_GRANTED ||
                checkSelfPermission(Manifest.permission.ACCESS_NETWORK_STATE) != PackageManager.PERMISSION_GRANTED ||
                checkSelfPermission(Manifest.permission.CAMERA) != PackageManager.PERMISSION_GRANTED ||
                checkSelfPermission(Manifest.permission.WRITE_EXTERNAL_STORAGE) != PackageManager.PERMISSION_GRANTED ||
                checkSelfPermission(Manifest.permission.READ_EXTERNAL_STORAGE) != PackageManager.PERMISSION_GRANTED) {
            //카메라 또는 저장공간 권한 획득 여부 확인
            if (shouldShowRequestPermissionRationale(Manifest.permission.WRITE_EXTERNAL_STORAGE) || shouldShowRequestPermissionRationale(Manifest.permission.CAMERA)) {
                // 카메라 및 저장공간 권한 요청
                requestPermissions(new String[]{Manifest.permission.INTERNET, Manifest.permission.CAMERA,
                        Manifest.permission.ACCESS_NETWORK_STATE,
                        Manifest.permission.WRITE_EXTERNAL_STORAGE, Manifest.permission.READ_EXTERNAL_STORAGE}, 1);
            } else {

            }
        }
    }

	//
    //권한 획득 여부에 따른 결과 반환
    //
    @Override
    public void onRequestPermissionsResult(int requestCode, @NonNull String[] permissions, @NonNull int[] grantResults) {
        super.onRequestPermissionsResult(requestCode, permissions, grantResults);

        if (requestCode == 1) {
            if (grantResults.length > 0) {
                for (int i = 0; i < grantResults.length; ++i) {
                    if (grantResults[i] == PackageManager.PERMISSION_DENIED) {
                        // 카메라, 저장소 중 하나라도 거부한다면 앱실행 불가 메세지 띄움
                        new AlertDialog.Builder(this).setTitle("알림").setMessage("권한을 허용해주셔야 앱을 이용할 수 있습니다.")
                                .setPositiveButton("종료", new DialogInterface.OnClickListener() {
                                    public void onClick(DialogInterface dialog, int which) {
                                        dialog.dismiss();
                                        finish();
                                    }
                                }).setNegativeButton("권한 설정", new DialogInterface.OnClickListener() {
                            public void onClick(DialogInterface dialog, int which) {
                                dialog.dismiss();
                                Intent intent = new Intent(Settings.ACTION_APPLICATION_DETAILS_SETTINGS)
                                        .setData(Uri.parse("package:" + getApplicationContext().getPackageName()));
                                getApplicationContext().startActivity(intent);
                            }
                        }).setCancelable(false).show();

                        return;
                    }
                }
                Toast.makeText(this, "Succeed Read/Write external storage !", Toast.LENGTH_SHORT).show();
            }
        }
    }

	//
    //액티비티가 종료될 때 결과를 받고 파일을 전송할 때 사용
    //
    @TargetApi(Build.VERSION_CODES.LOLLIPOP)
    @Override
    protected void onActivityResult(int requestCode, int resultCode, Intent data) {

        switch (requestCode) {
            case FILECHOOSER_NORMAL_REQ_CODE:
                if (resultCode == RESULT_OK) {
                    if (filePathCallbackNormal == null) return;
                    Uri result = (data == null || resultCode != RESULT_OK) ? null : data.getData();
                    //  onReceiveValue 로 파일을 전송한다.
                    filePathCallbackNormal.onReceiveValue(result);
                    filePathCallbackNormal = null;
                }
                break;
            case FILECHOOSER_LOLLIPOP_REQ_CODE:
                if (resultCode == RESULT_OK) {
                    if (filePathCallbackLollipop == null) return;
                    if (data == null)
                        data = new Intent();
                    if (data.getData() == null)
                        data.setData(cameraImageUri);

                    filePathCallbackLollipop.onReceiveValue(WebChromeClient.FileChooserParams.parseResult(resultCode, data));
                    filePathCallbackLollipop = null;
                } else {
                    if (filePathCallbackLollipop != null) {   //  resultCode에 RESULT_OK가 들어오지 않으면 null 처리하지 한다.(이렇게 하지 않으면 다음부터 input 태그를 클릭해도 반응하지 않음)
                        filePathCallbackLollipop.onReceiveValue(null);
                        filePathCallbackLollipop = null;
                    }

                    if (filePathCallbackNormal != null) {
                        filePathCallbackNormal.onReceiveValue(null);
                        filePathCallbackNormal = null;
                    }
                }
                break;
            default:

                break;
        }

        super.onActivityResult(requestCode, resultCode, data);
    }

	//
    // 카메라 기능 구현
    //
    private void runCamera(boolean _isCapture) {
        Intent intentCamera = new Intent(MediaStore.ACTION_IMAGE_CAPTURE);
//        intentCamera.setFlags(Intent.FLAG_ACTIVITY_NEW_TASK);
        File path = getFilesDir();
        File file = new File(path, "picture.png"); // sample.png 는 카메라로 찍었을 때 저장될 파일명이므로 사용자 마음대로
        // File 객체의 URI 를 얻는다.
        if (Build.VERSION.SDK_INT >= Build.VERSION_CODES.N) {
            String strpa = getApplicationContext().getPackageName();
            cameraImageUri = FileProvider.getUriForFile(this, strpa + ".fileprovider", file);
        } else {
            cameraImageUri = Uri.fromFile(file);
        }
        intentCamera.putExtra(MediaStore.EXTRA_OUTPUT, cameraImageUri);

        if (!_isCapture) { // 선택팝업 카메라, 갤러리 둘다 띄우고 싶을 때
            Intent pickIntent = new Intent(Intent.ACTION_PICK);
            pickIntent.setType(MediaStore.Images.Media.CONTENT_TYPE);
            pickIntent.setData(MediaStore.Images.Media.EXTERNAL_CONTENT_URI);

            String pickTitle = "사진 가져올 방법을 선택하세요.";
            Intent chooserIntent = Intent.createChooser(pickIntent, pickTitle);

            // 카메라 intent 포함시키기..
            chooserIntent.putExtra(Intent.EXTRA_INITIAL_INTENTS, new Parcelable[]{intentCamera});
            startActivityForResult(chooserIntent, FILECHOOSER_LOLLIPOP_REQ_CODE);
        } else {// 바로 카메라 실행..
            startActivityForResult(intentCamera, FILECHOOSER_LOLLIPOP_REQ_CODE);
        }
    }
}
Build
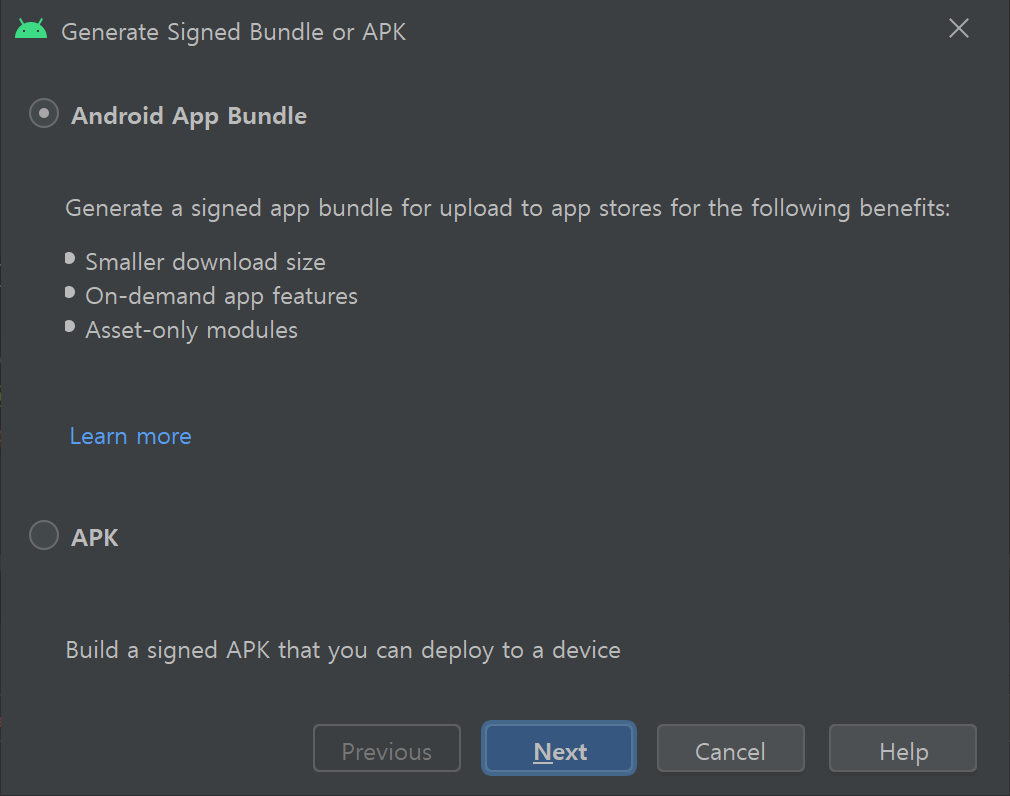
Build -> Generate Signed Bundle / APK클릭
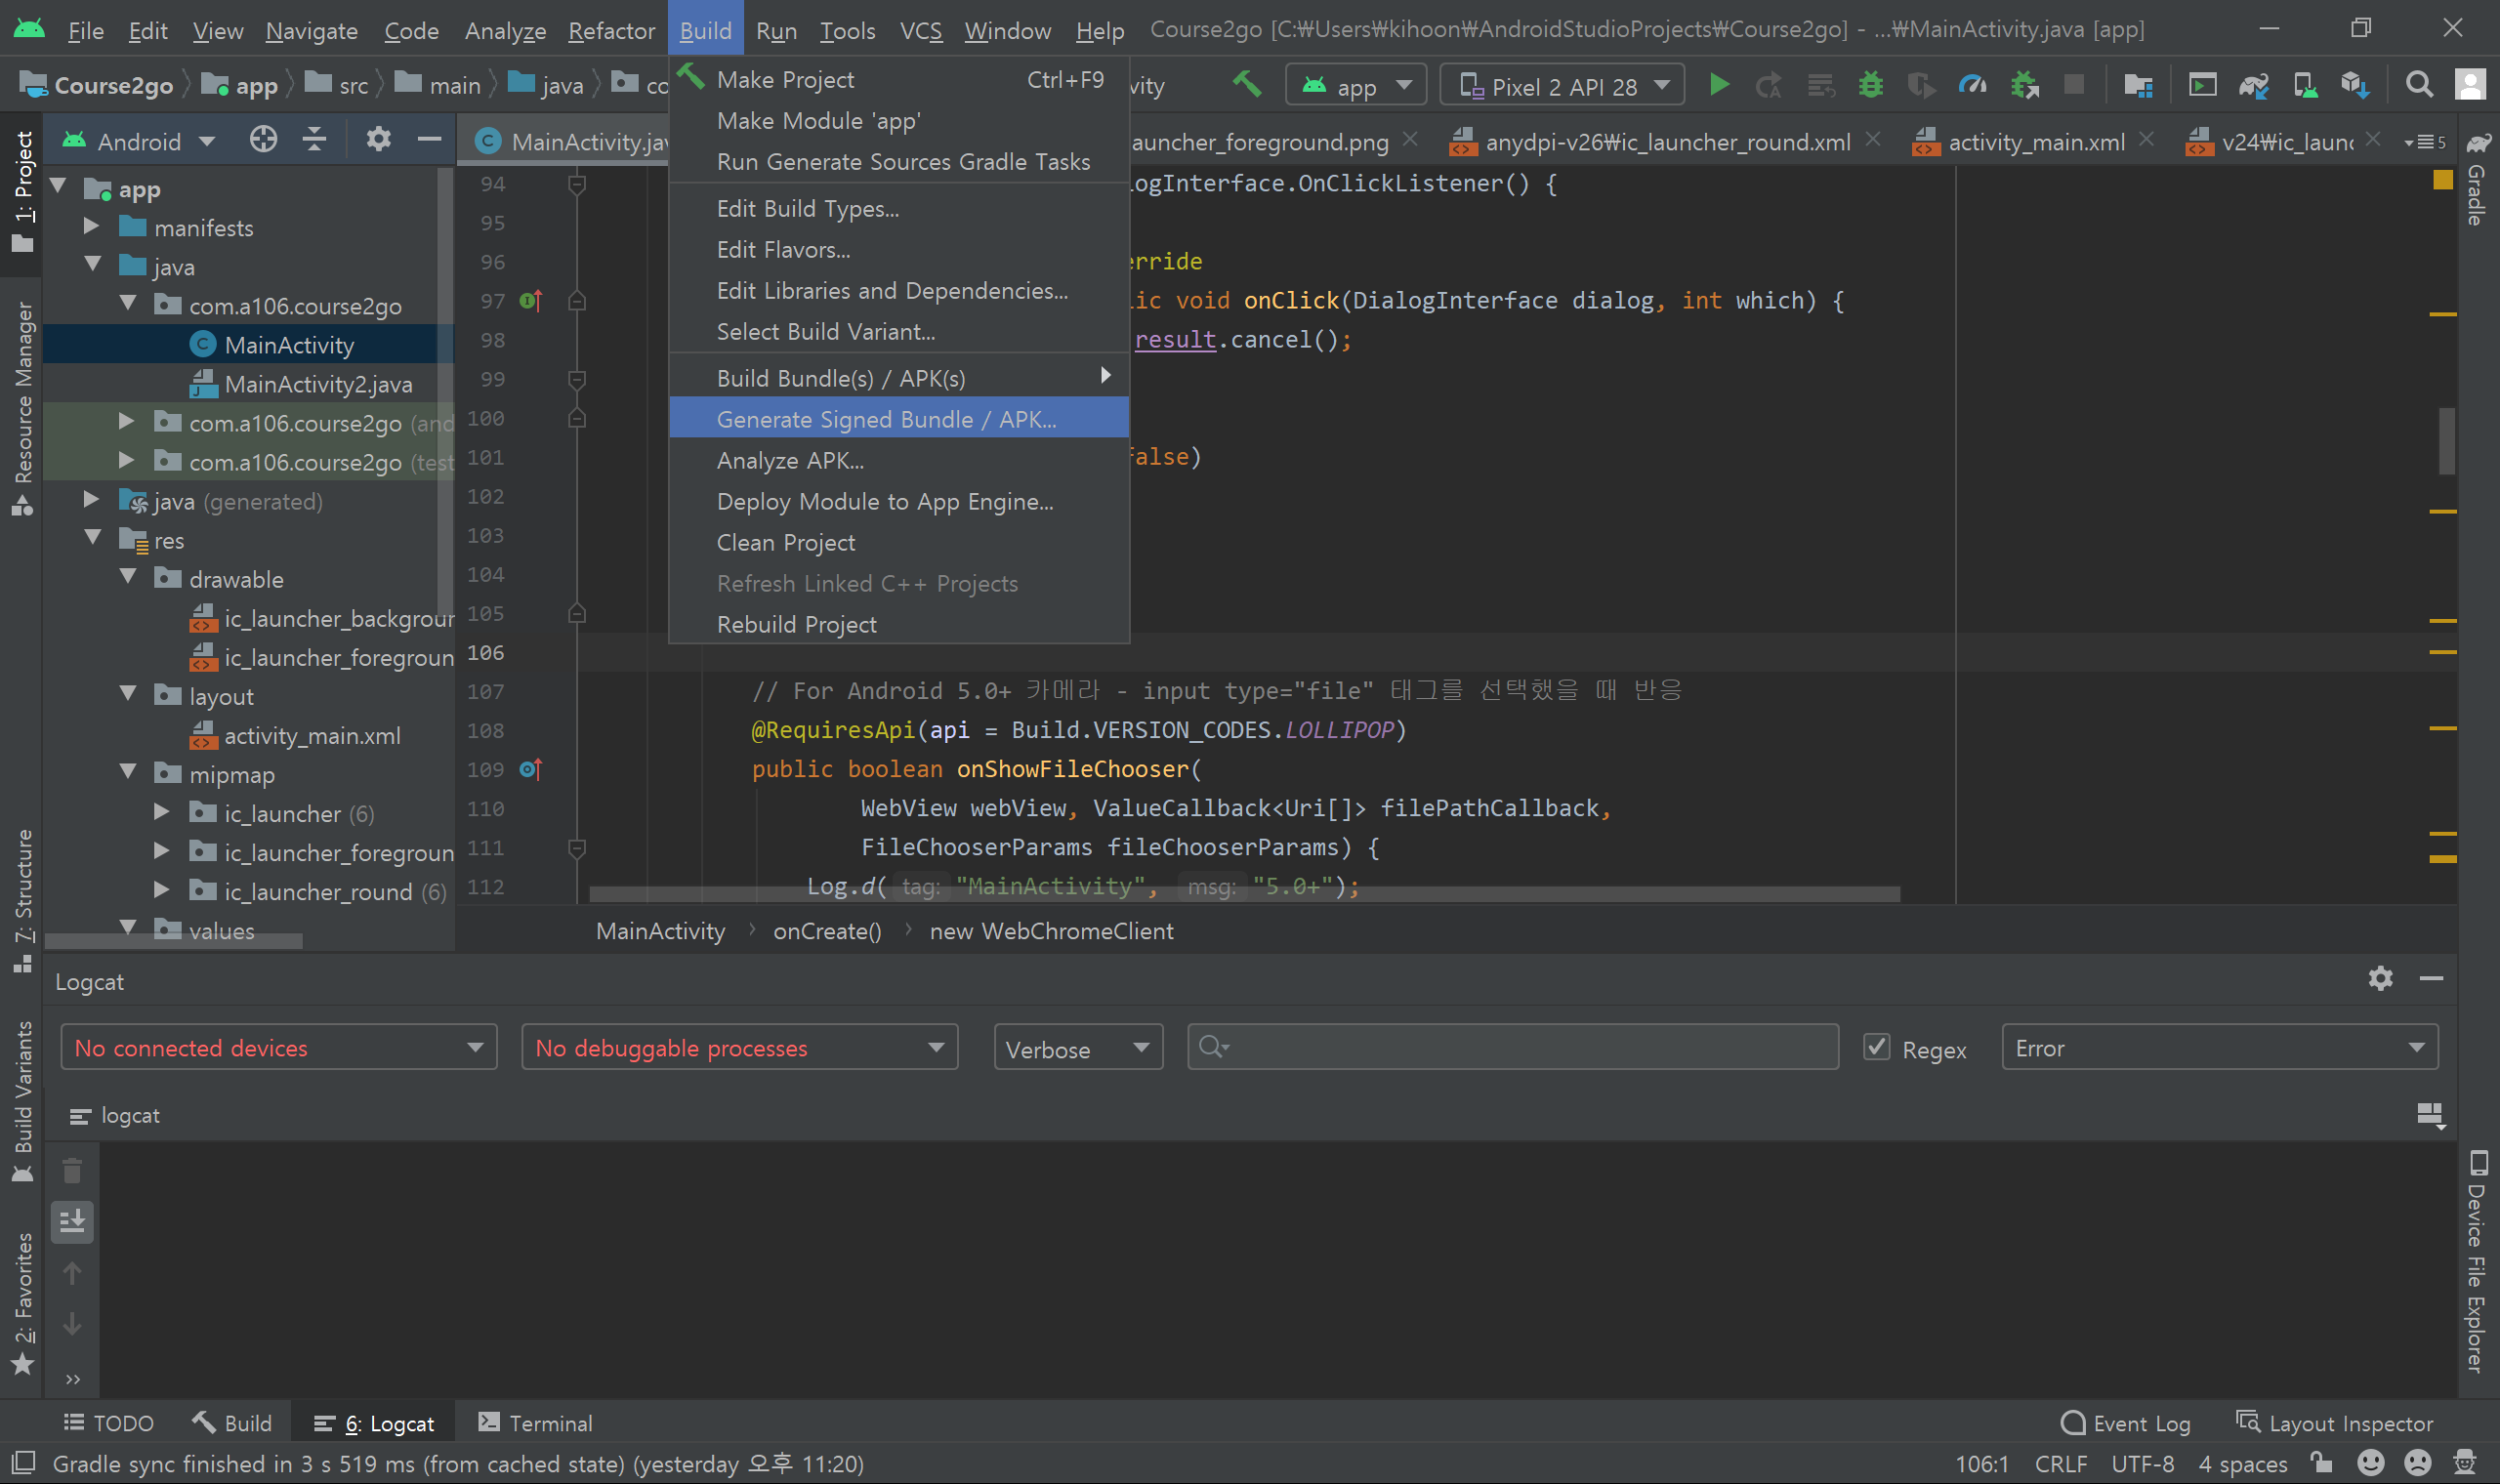
- Android App Bundle 선택
2021년 8월부터 AAB(Android App Bundle)로 출시하게도록 바뀜
- key 생성 (Next 클릭 후
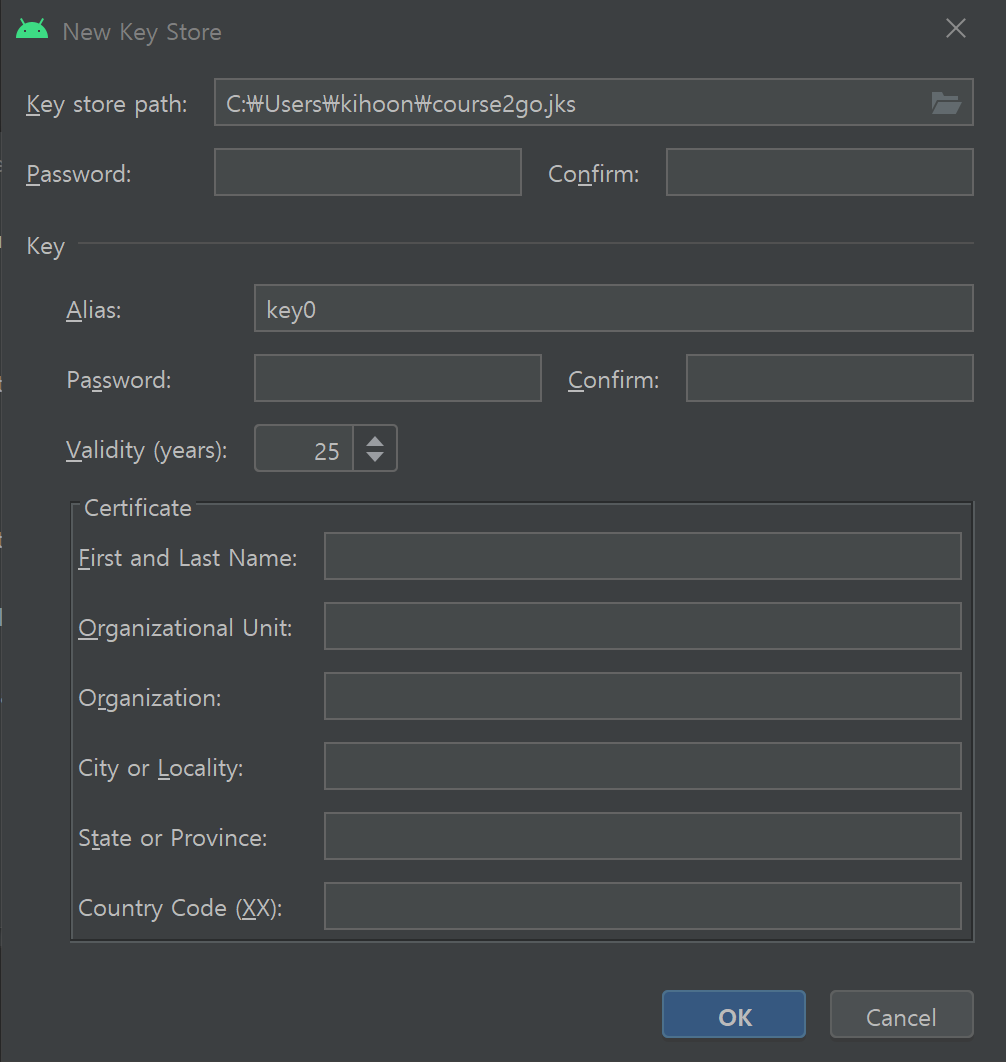
Create new버튼으로 이동)
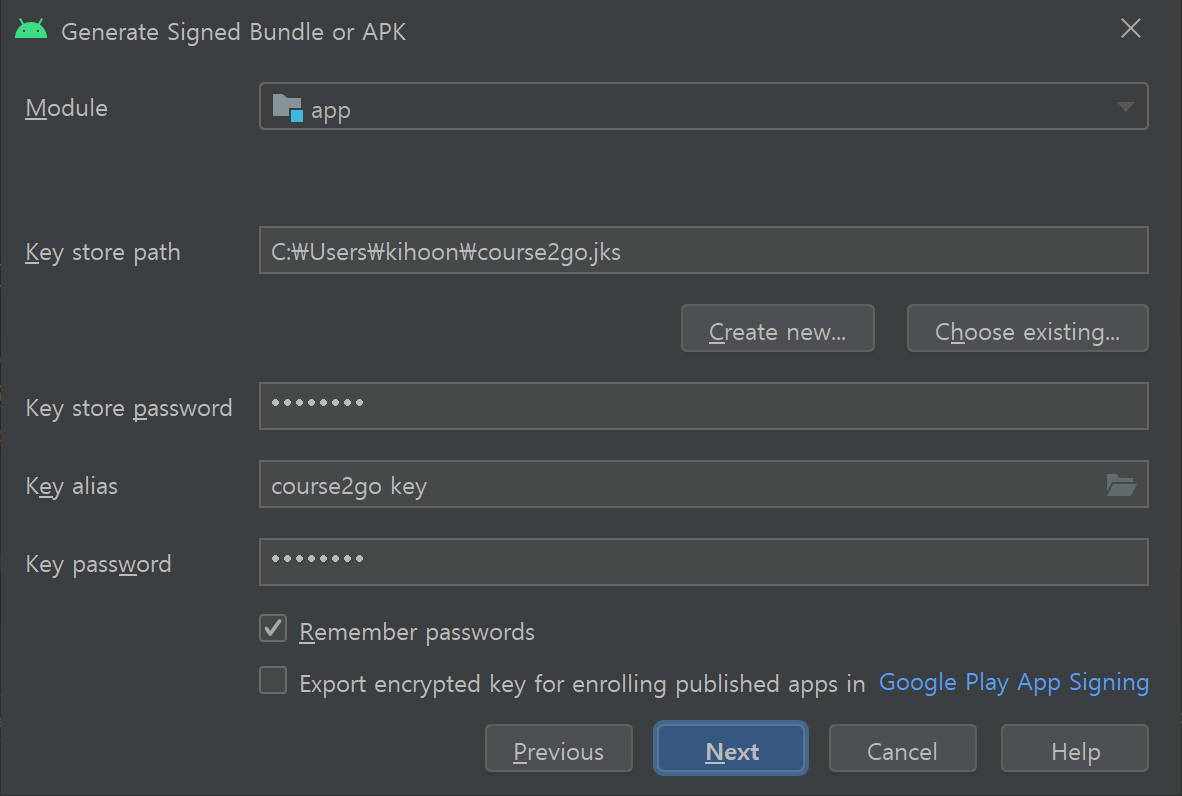
한번 build하면 자동 저장되어 다음에 다시 입력하지 않고 사용 가능하지만 나중을 위해
Key Store Path와Password는 잊어버리지 않게 적어둔다
Alias는 원하는 대로 이름 입력.Password도 원하는 대로 만들면 되지만 잊어버리지 않도록 위와 똑같이 설정해주면 편하다.Validity도 원하는 만큼 입력
Certificate안의 내용 중 해당되는 내용은 모두 작성하자
- key 입력
위에서 작성한 정보를 입력한다.
App을 처음 빌드하는 경우에는 아래 체크박스도 체크해주자
완료가 되었다면
Next
- Build aab file
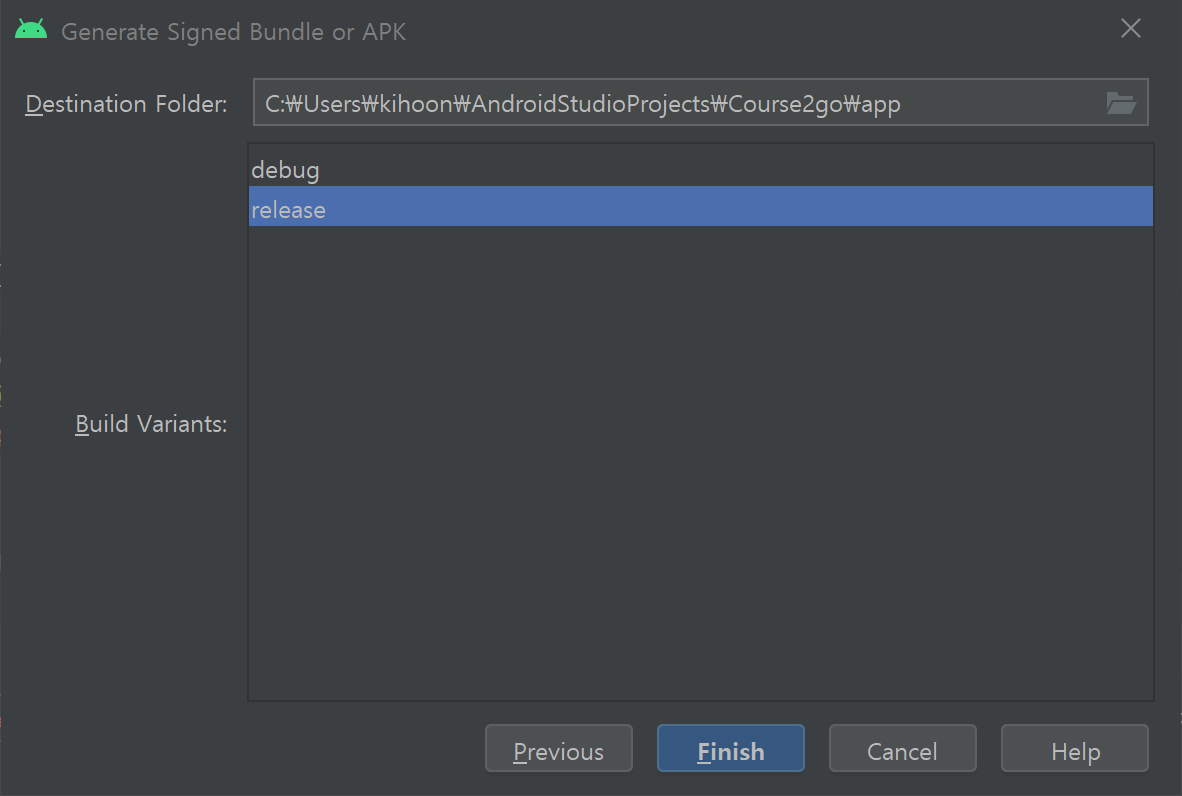
처음 release하는 것이므로 release를 선택하고
Finish를 클릭하면 일정 시간 경과 후 작업이 완료된다오른쪽 아래에 뜨는 알림을 클릭해서 폴더로 이동하면
app-release.aab파일을 볼 수 있는데 이 파일을 PlayStore에서 출시할 때 첨부해주면 된다
PlayStore 개발자 등록
등록 과정이 복잡하고, 이미 등록을 완료했기 때문에 링크로 첨부
App Release 링크와 App Upload 링크를 참고하여 진행하면 개발자 등록이 가능하다.